Thursday 26 July 2012

Mexican Three-Milk Cake


I was looking for a Mexican black bean and tomato salsa recipe the other day and happened upon this intriguing cake recipe. It involves baking a pretty standard vanilla cake then pouring copious amounts of milk (three different kinds, like the title says), all over it. Once I read it, it went around and around in my head until I found myself at the supermarket with a shopping basket full of dairy produce. I just had to try it. The original recipe had an error in it, but I have corrected it in the recipe below. It also said to leave the cake in the refrigerator for 2 hours only before serving. We had a slice for dessert about 4 hours after the milk went on and it was delicious. But we had another slice with a cup of tea (don't judge), the next day and I'm pretty sure we found vanilla cake nirvana.


NOTE: For best results, begin this recipe the day ahead.

Mexican Three-Milk Cake
from Donna Hay Magazine

180g unsalted butter, softened
220g caster sugar
2 teaspoons vanilla bean paste
1 tablespoon vanilla extract
5 eggs
225g self raising flour
250ml milk
250ml sweetened condensed milk
250ml buttermilk
500ml pouring cream
sliced fruit (The original recipe calls for passionfruit pulp, but I had some perfect strawberries so I used them.)

Place the butter and sugar into the bowl of an electric mixer and beat until fluffy and pale, about 8-10 minutes. Add the vanilla paste and beat to combine. Gradually add the eggs, one at a time, beating well after each addition. Gradually add the flour and beat until just combined. Spoon the mixture into a lightly greased 20cm x 30cm brownie tin lined with non-stick baking paper and bake for 30-35 minutes or until cooked when tested with a skewer. Using a skewer, make holes all over the top of cake and place in the refrigerator to cool completely.

While the cake is cooling, place all of the milks and the vanilla extract in a jug and mix well to combine. Pour the milk mixture over the cake and return to the refrigerator overnight. The cake will absorb the milk and you'll be left with a deliriously moist, vanilla scented, buttery golden slab.

Place the cream in a bowl and whisk until soft peaks form. Top the cake with the cream. You can pile the sliced fruit all over the cake, or you can do as I did and just top each individual slice as you serve it.

Wednesday 25 July 2012

Millers Loaf


Real sourdough bread contains flour, salt and water... that's it. No baker's yeast, no sugar, no raising agents other than the sourdough starter, no emulsifiers, no bread improvers, just flour, salt and water. It can contain a mix of different flours, or seeds, nuts and grains or fruit for fruit sourdough loaves (obviously), but noting else. If the sourdough bread you bought contains anything other than these ingredients, it's not real sourdough bread. Boy, I'm glad I got that off my chest.
Real sourdough bread (I'll stop using italics, as I think I've made my point), is a labour of love. If you don't intend to ever go to the trouble of making your own sourdough bread, then just sit back and enjoy the pictures and THANKS for listening so far xoxox

For those of you who are in, let's get "started".

If you don't have a sourdough starter check out this web page, it's how I got my sourdough starter started.


Millers Loaf
from Paul Allam and David McGuinness' Bourke Street Bakery
Makes 3 small loaves

390g sourdough starter
440g organic plain flour
145g organic wholemeal flour
145g organic rye flour
360ml water
20g sea salt

In the bowl of an electric mixer with the dough hook attached, add the plain flour, wholemeal flour, rye flour and the water. Mix on low speed for about 7 minutes. Cover the bowl with plastic wrap and set aside for 20 minutes.

Sprinkle the salt over the dough and mix on low speed for about 6 minutes, or until a smooth elastic dough forms.

Lightly grease a container with oil spray and put the dough inside. Cover with plastic wrap and set aside at room temperature for 1 hour to prove.

Turn the dough out onto a lightly floured surface and press out into a rectangle, about 2.5cm thick. Fold one-third back onto itself, then repeat with the remaining third (like a business letter - if you can remember what one of those looks like). Turn the dough 90 degrees and fold it over again into thirds. Place the dough back into the oiled container and prove again for another hour. (You are creating layers and tension in the dough - that's a good thing).

Divide the dough into three even-sized portions, weighing about 500g each. Working with one protion of dough at a time, shape the loaves into rounds.

Line a large baking sheet with baking paper and place the dough rounds, evenly-spaced, on it. Place in the refrigerator loosely covered with a plastic bag for 8-12 hours. The cold and long fermentation in the fridge is for flavour development and volume.

Remove the loaves from the refrigerator and let them come to room temperature - this can take anywhere between 1 and 4 hours - until each loaf has grown in size by two-thirds.

Just before you put them in the oven, make a cross in the top of each loaf using a sharp knife. I slashed mine then realised my oven wasn't up to temperature so they had to sit around for about 5 minutes and the crosses healed over a bit so only one loaf got that crazy-busted-out look that I love.

Preheat the oven to its highest temperature. Spray the oven with water and bake the loaves for 20 minutes, then turn the loaves and bake for a further 10 minutes, watching carefully to make sure that the loaves do not burn. Baking shouldn't take any longer than 40 minutes. If the oven temperature is too fierce, turn the heat down a bit.

And there you have it -  your own artisan sourdough loaves. It will have been a lot of work and commitment, but you'll forget about all that the moment you sink you teeth into that chewy crust and that tangy, tender crumb. Enjoy, you worked hard for it.


Tuesday 24 July 2012

Beef and Bean Sausage Rolls


It started out as just an average day. I got the boys off to school then ran 8 kilometres then came home to find that  The Curious Country Cook has kindly nominated me for a Versatile Blog Award! My average day,  tuned into a FAB day. Thank you Curious Country Cook, you made my day.


I have learned that when nominated for the Versatile Blogger Award, one must do the following steps:
  • Thank the person who gave you the award and provide a link to their page on your blog.
  • Nominate 15 blogs for the award and let them know by leaving them a comment.
  • Copy/Paste the award on your blog post.
  • Share 7 things about yourself.

So here goes:

The Blogs
  1. The Cooking Bride: Her photographs are to-die-for and her food is the kind of food I want to eat... like now... like right now.
  2. Fabulous You: Check out these cupcakes and tell me she's not worthy of an award... or may be a dozen.
  3. Confessions of a Bright-Eyed Baker: In her own words she's "a girl who loves to bake" - so we're like spirit sisters... sort of. 
  4. Greens & Seeds: Super healthy, beautifully photographed food. All the food is vegetarian and focusses on natural, nourishing, delicious whole foods. This is the blog I turn to when I've eaten too much cake.
  5. Apt. 2B Baking Co.: An utterly butterly blog. 
  6. Food Swoon: I started to bookmark the recipes in her recipe index, then realised I'd marked them all.
  7. Hungry Brownie: A feast for the tummy and the eyes.
  8. The Galley Gourmet: A blog for those who want to cook and eat great food at home with family and friends. Couldn't you just eat one of these Shrimp and Spanish Chorizo Bites right now?
  9. Two Tarts: Two friends cooking things from scratch. You can learn how to make things like  homemade Greek yoghurt and corn tortillas from go-to-whoa. Plus they have an extensive cocktail index... yes, that's right. But don't rush off to find your cocktail shaker just yet, I still have six more blogs to tell you about.
  10. Wing-It Vegan: Yummy, creative vegan food. Funny and delicious- one of my favourite combinations.
  11. Sprinkled with Flour: Beautiful images of great food, obviously cooked with more than a sprinkle of love. 
  12. @ Down Under: A French expatriate living in New Zealand. A blogger from the same hemisphere as me. So when "seasonal" is mentioned, I think "Oh, that's me too." (I read lots of blogs from the other side, so it's nice to be in the same season, picking the same fruit and vegetables as some one else.) @ Down Under is a gorgeous blog which features not only beautiful food shots, but also life in stunning New Zealand.
  13. My Kitchen Affair: Yum, Oh yum. Take a look at this Ice Cream, need I say more?
  14. SoupAddict: A blogger who is dedicated to "whole, fresh foods, prepared with minimal fuss". Yes, yes and yes.
  15. The Comfort of Cooking: I just want to cook and eat everything I see on this blog. 

Seven Things About Me
  1. I'm an excellent bowl and spoon licker.
  2. My cook book collection is way bigger and more interesting than my nail polish collection.
  3. I have 5 laying hens and one of them is called Jennifer.
  4. I love fennel tea.
  5. I have eleven books (one of which I am reading and the other 10 are "pending"), a lip gloss, a reading lamp, a collection of rings (more interesting than my nail polish collection, but not as interesting as my cook book collection) and a butterfly-shaped money box on my night-stand.
  6. My favourite colour is grey - not technically a colour, but it's still my favourite.
  7. I live to eat, I don't eat to live and I run so I can eat what I like and so that I live long enough to eat everything I want - so there.


In other news, here are some hearty and fully-delicious sausage rolls I made. Think chilli con carne wrapped in a doona of buttery puff pastry - yeah, you heard right!


Beef and Bean Sausage Rolls
from Paul Allam and David McGuinness'  Bourke Street Bakery
Makes 18

For the Sausage Rolls:
1 x 400g red kidney beans, drained and rinsed
20ml extra virgin olive oil
3 garlic cloves, finely chopped
2 small red chillies, seeded and  finely chopped
1 small brown onion, finely chopped
500g ground beef
30g dry breadcrumbs
12g salt
7g white pepper
3 sheets store-bought ready-rolled puff pastry (or if you're bonkers like me, you make your own)


For the Egg Wash:
1 egg
1/2 cup milk
chilli flakes, for sprinkling

Preheat the oven to 200 degrees C.

Heat the oil in a saucepan over medium heat. Add the onions, chillies and garlic and cook for 2 minutes. Add the kidney beans stir together for 1 minute. Remove from the heat and allow to cool.

Put the bean mixture in a large mixing bowl and add the beef, breadcrumbs, salt and white pepper. Using your hands, mix the meat quite forcefully for 3 minutes to thoroughly combine.

Make an egg wash by whisking together the egg, milk and a pinch of salt. 

Take a pastry sheet and cut it in half so that you have two long rectangles.

Divide the beef mixture into six even-sized portions. On a clean work surface, roll each portion out into a sausage shape to fit the length of the pastry. Place each log in the centre of a pastry sheet and brush one long edge with egg wash. Firmly fold the pastry over, pressing to enclose the log tightly, leaving the ends open. Cut each roll into three even-sized pieces and place on baking trays lined with baking paper. Brush the top of each roll with egg wash and sprinkle with chilli flakes. Reduce the oven temperature to 190 degrees C and bake for 35-40mins, or until they are golden brown and delicious.


Monday 23 July 2012

Ragù di Maiale (Pork Ragù)


I have hundreds of recipes for "Spag Bol". (That's what we Aussies tend to call Spaghetti Bolognese - it's practically our national dish.) I have recipes which require eight hours of simmering, whole bottles of your best Chianti, six different cuts of meat, fresh tomatoes straight from your own organic vegetable garden and crushed by the feet of virgins (that last bit about the tomatoes is a slight exaggeration). But Spag Bol can get pretty labour intensive and time consuming depending on who you take your instructions from. I turned to the wonderful Giorgio Locatelli and he lead me down the path to simple, delicious, uncompicated pasta sauce heaven. Strictly speaking, this isn't spaghetti Bolognese because I used farfalle. But my kids like the "bow-tie" shape and I was not about to complicate matters after making the perfect simple sauce.


Ragù di Maiale (Pork Ragù)
from Giorgio Locatelli's Made in Italy

500g pork neck, cut into a fine dice
1 tablespoon oil
1 carrot, roughly chopped
1 small onion, roughly chopped
Sprig of rosemary and a bay leaf tied together to create a bouquet garni
1 garlic cloves
400ml of white wine
1/2 tablespoon of tomato paste
600ml tomato passata
125ml milk
salt and pepper

Make sure the pork is bought to room temperature, so it sears rather than stews when it goes into the pan.

Put the vegetables into a food processor and whiz until they are finely chopped.

Heat the oil in a wide bottomed pan, add the vegetables, herbs and sweat over high heat for 5-8 minutes without allowing it to colour (You need to keep stirring)

Season the meat with salt and pepper and add to the pan of vegetables making sure that the meat covers the base of the pan. Leave for about 5-6 minutes, so that the meat seals underneath and heats through completely, before you start stirring (otherwise it will ooze protein and liquid and boil rather than sear). Take care that the vegetables don’t burn – add a little oil and adjust the heat if necessary.

Stir the meat and vegetables every few minutes for about 10-12 minutes, until the meat starts to stick to the pan. At this point, the meat is ready to take the wine.

Add the wine and let it reduce right down to virtually nothing, then add the tomato paste and cook for a couple of minutes, stirring all the time.

Add the passata with about a cup of water. Bring to the boil, then turn down to a simmer. Add the milk (the milk is an Italian Nonnas trick to give the Ragù a good colour and creaminess and draws out a little of the acidity of the tomato paste). Cook for about 1 1/2 hours adding a little more water if necessary, until you have a thick sauce.

When you’re ready to serve, prepared 500g of your favourite pasta according to the packet instructions. Add the pasta to the ragù, and toss well, adding some of the cooking water if necessary to loosen the sauce. Serve with freshly grated parmesan cheese.

Sunday 22 July 2012

White Bean and Pistachio Dip


Dips are not photogenic. Trust me on this one. No matter how you try to present it, dip is just... well, blobby. Try as a might to dazzle you with brilliant dippy pictures, it wasn't possible, so I just had to accept it and move on. Looks aside, home made dips are worlds apart from their store-bought counterparts. Not only do they taste sooooo much better, but you are in control of what goes in them. Ever wondered what all that mumbo jumbo is on the ingredients list on the packaging of shop-bought dips? *Emulsifying agents, anti-caking thingos, flavours 622, 621, 397, 488, malto-anti-hydro-whatchamacallits... and all that SUGAR... scary stuff. (* These are made-up, but you get my drift.) Take my advice and make your own. It may not be any prettier than the stuff from the supermarket, but it will taste great and it wont give you nightmares.

White Bean and Pistachio Dip
from Good Chef Bad Chef

1 x 400g of white beans (I used cannellini beans), drained and rinsed
1/2 cup raw, unsalted pistachios, roughly chopped
1/2 cup fresh mint leaves
2 teaspoons finely grated lemon zest
1/3 cup almond milk
1 teaspoon sea salt flakes
extra chopped pistachios and lemon zest from garnish


Puree all ingredients together in a food processor until smooth. Dollop onto a large platter and sprinkle with extra chopped pistachios and lemon zest. Serve with toasted mountain bread as I did, or some crackers, or raw carrot sticks or as a spread on wraps.

Saturday 21 July 2012

Billionaires Flourless Chocolate Frangelico Cake (Gluten Free)


Rich, sexy, dark, hansome - sounds like a good way to start a weekend.


Billionaires Flourless Chocolate Frangelico Cake (Gluten Free)
slightly adapted from Donna Hay's No Time to Cook

250g dark chocolate
100g milk chocolate
185g unsalted butter, chopped
6 eggs, room temperature
1 cup light brown sugar
1/4 cup Frangelico
1 cup hazelnut meal
Cocoa powder for dusting
Whipped cream for serving (optional).

Preheat the oven to 170 degrees C. Spray a 22cm springform round cake pan with cooking oil spray and line the base and sides with baking paper.

Place the chocolate and butter into a saucepan over low heat and stir until melted.

In a large bowl, whisk the eggs, sugar, Frangelico and hazelnut meal until combined. Add the chocolate mixture and whisk again until smooth

Pour the batter into the prepared pan and cover with foil.

Bake for 40 minutes, then remove the foil and cool the cake in the pan the  refrigerate until cold.

When you are ready to serve, remove the cake from the pan and dust generously with the cocoa powder.

Serve with a dollop of whipped cream (optional).

Friday 20 July 2012

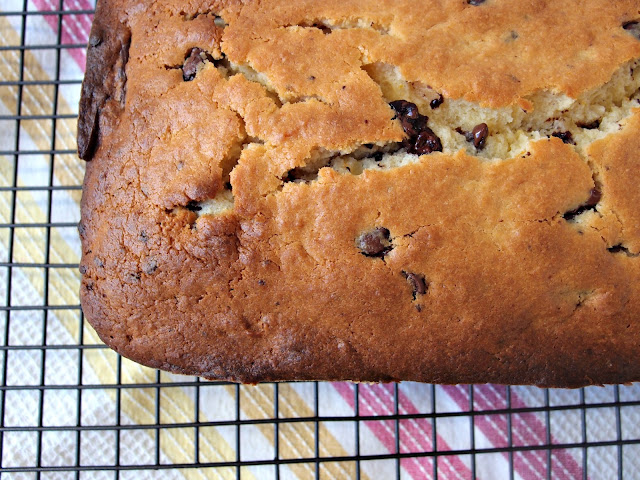
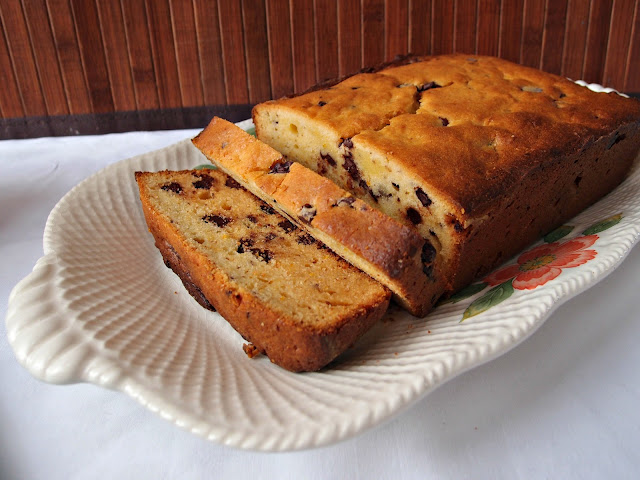
Chocolate-Orange Cream Cheese Pound Cake


I'm knee-deep in the Tour de France at the moment. I've already written about my obsession commitment to this gritty event here. Up 'til all hours, cheering on those awesome boys on their bikes. I'm so invested in the strategies, placings, stage wins, who's King of the Mountain, who's ahead in the General Classification, who's wearing the Green Jersey... that I'm just not getting enough sleep. I'm walking around like a zombie through the day wearing odd socks to the gym, forgetting my phone when I go out and unable to string a decent sentence together. The Tour de France is certainly a test of endurance, pushing the body and mind to their absolute limits... and that's me I'm talking about, I'm sure the athletes are coping just fine.


Chocolate-Orange Cream Cheese Pound Cake
from Joy the Baker

2 cups plain flour
1 1/2 teaspoons baking powder
1/2 teaspoon salt
1 1/2 cups sugar
2 tablespoons orange zest
250g cream cheese, softened
170g unsalted butter, at room temperature
4 large eggs
2 teaspoons vanilla extract
1 cup dark chocolate pieces (I used a mix of dark chocolate chips and some chopped orange infused dark chocolate)

Place a rack in the center of the oven and preheat to 165 degrees C. Grease a 25 x 13cm baking pan and dust with flour. Set aside.

In a medium bowl, whisk together flour, baking powder, and salt. Set aside.

On a clean cutting board or counter, place the sugar. Add the orange zest. With a bench scraper or the back of the spoon, work the zest into the granulated sugar, creating a fragrant and orange flavored sugar. Set aside.

In the bowl of an electric mixer fitted with a paddle attachment, cream together softened butter and cream cheese. Stop the mixer occasionally to scrape down the bowl and make sure that the butter and cream cheese are evenly mixed. Add the citrus sugar to the butter and cream cheese mixture, and beat on medium speed until smooth and creamy, about 3 minutes.

Stop the mixer. Scrape down the sides of the bowl. On medium speed, beat in one egg at a time, beating for one minute after each addition. Stop the mixer and scrape down the sides of the bowl as necessary. Beat in vanilla extract.

Add dry ingredients all at once. Beat on low speed until dry ingredients are completely incorporated. Fold in the chocolate pieces.

Spoon batter into prepared pan. Bake for 50-60 minutes, rotating once or twice during baking. Bake until a skewer inserted in the center comes out clean, or with just a few crumbs. You might consider loosely placing a foil tent over the cake after about 45 minutes of baking. This will keep it from browning too much, and help the centre bake up.

Cake will last, well wrapped at room temperature, for up to four days.

Thursday 19 July 2012

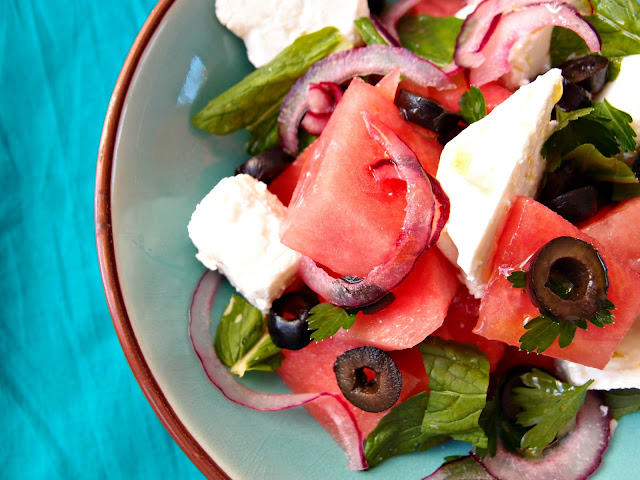
Watermelon and Feta Salad


This is my way of pretending winter isn't happening.


Watermelon and Feta Salad
from Nigella Lawson's Forever Summer
Serves 8

1 small red onion
2-4 limes, depending on juiciness
1.5 kg sweet, ripe watermelon
250g feta cheese
Bunch fresh flat-leaf parsley
Bunch fresh mint, chopped
3-4 tablespoons extra virgin olive oil
100g pitted black olives
Black pepper

Peel and halve the red onion and cut into very fine half-moons and put in a small bowl to steep with the lime juice, to bring out the transparent pinkness in the onions and diminish their rasp. Two limes should do it.

Remove the rind and pips from the watermelon, and cut into approximately 4cm triangular chunks. Cut the feta into similar sized pieces and put them both into a large, wide shallow bowl. Tear off sprigs of parsley so that it is used like a salad leaf, rather than a garnish, and add to the bowl along with the chopped mint.

Tip the now glowingly puce onions, along with their pink juices over the salad in the bowl, add the oil and olives, then using your hands toss the salad very gently so that the feta and melon don't lose their shape. Add a good grinding of black pepper and taste to see whether the dressing needs more lime.